People & CRM
The CRM is the core of Modality. Every interaction — ticket purchases, form submissions, campaign clicks — flows back to the person record. This guide covers everything you need to know about managing your contacts.
Overview of the People Object
People are the central object in Modality. A person record represents a contact — an attendee, lead, subscriber, customer, or team member. Every person has built-in fields (first name, last name, email, phone, status, source) and can be extended with unlimited custom fields.
People are connected to every other module: they appear as ticket buyers on events, as form submitters, as campaign recipients, and as automation targets. The activity timeline on each person aggregates all of these interactions into a single chronological view.
Each person has a subscription status that controls email eligibility:
- Active — eligible to receive campaigns
- Pending — awaiting double opt-in confirmation (if enabled)
- Unsubscribed — opted out of marketing emails
- Bounced — email address returned a hard bounce
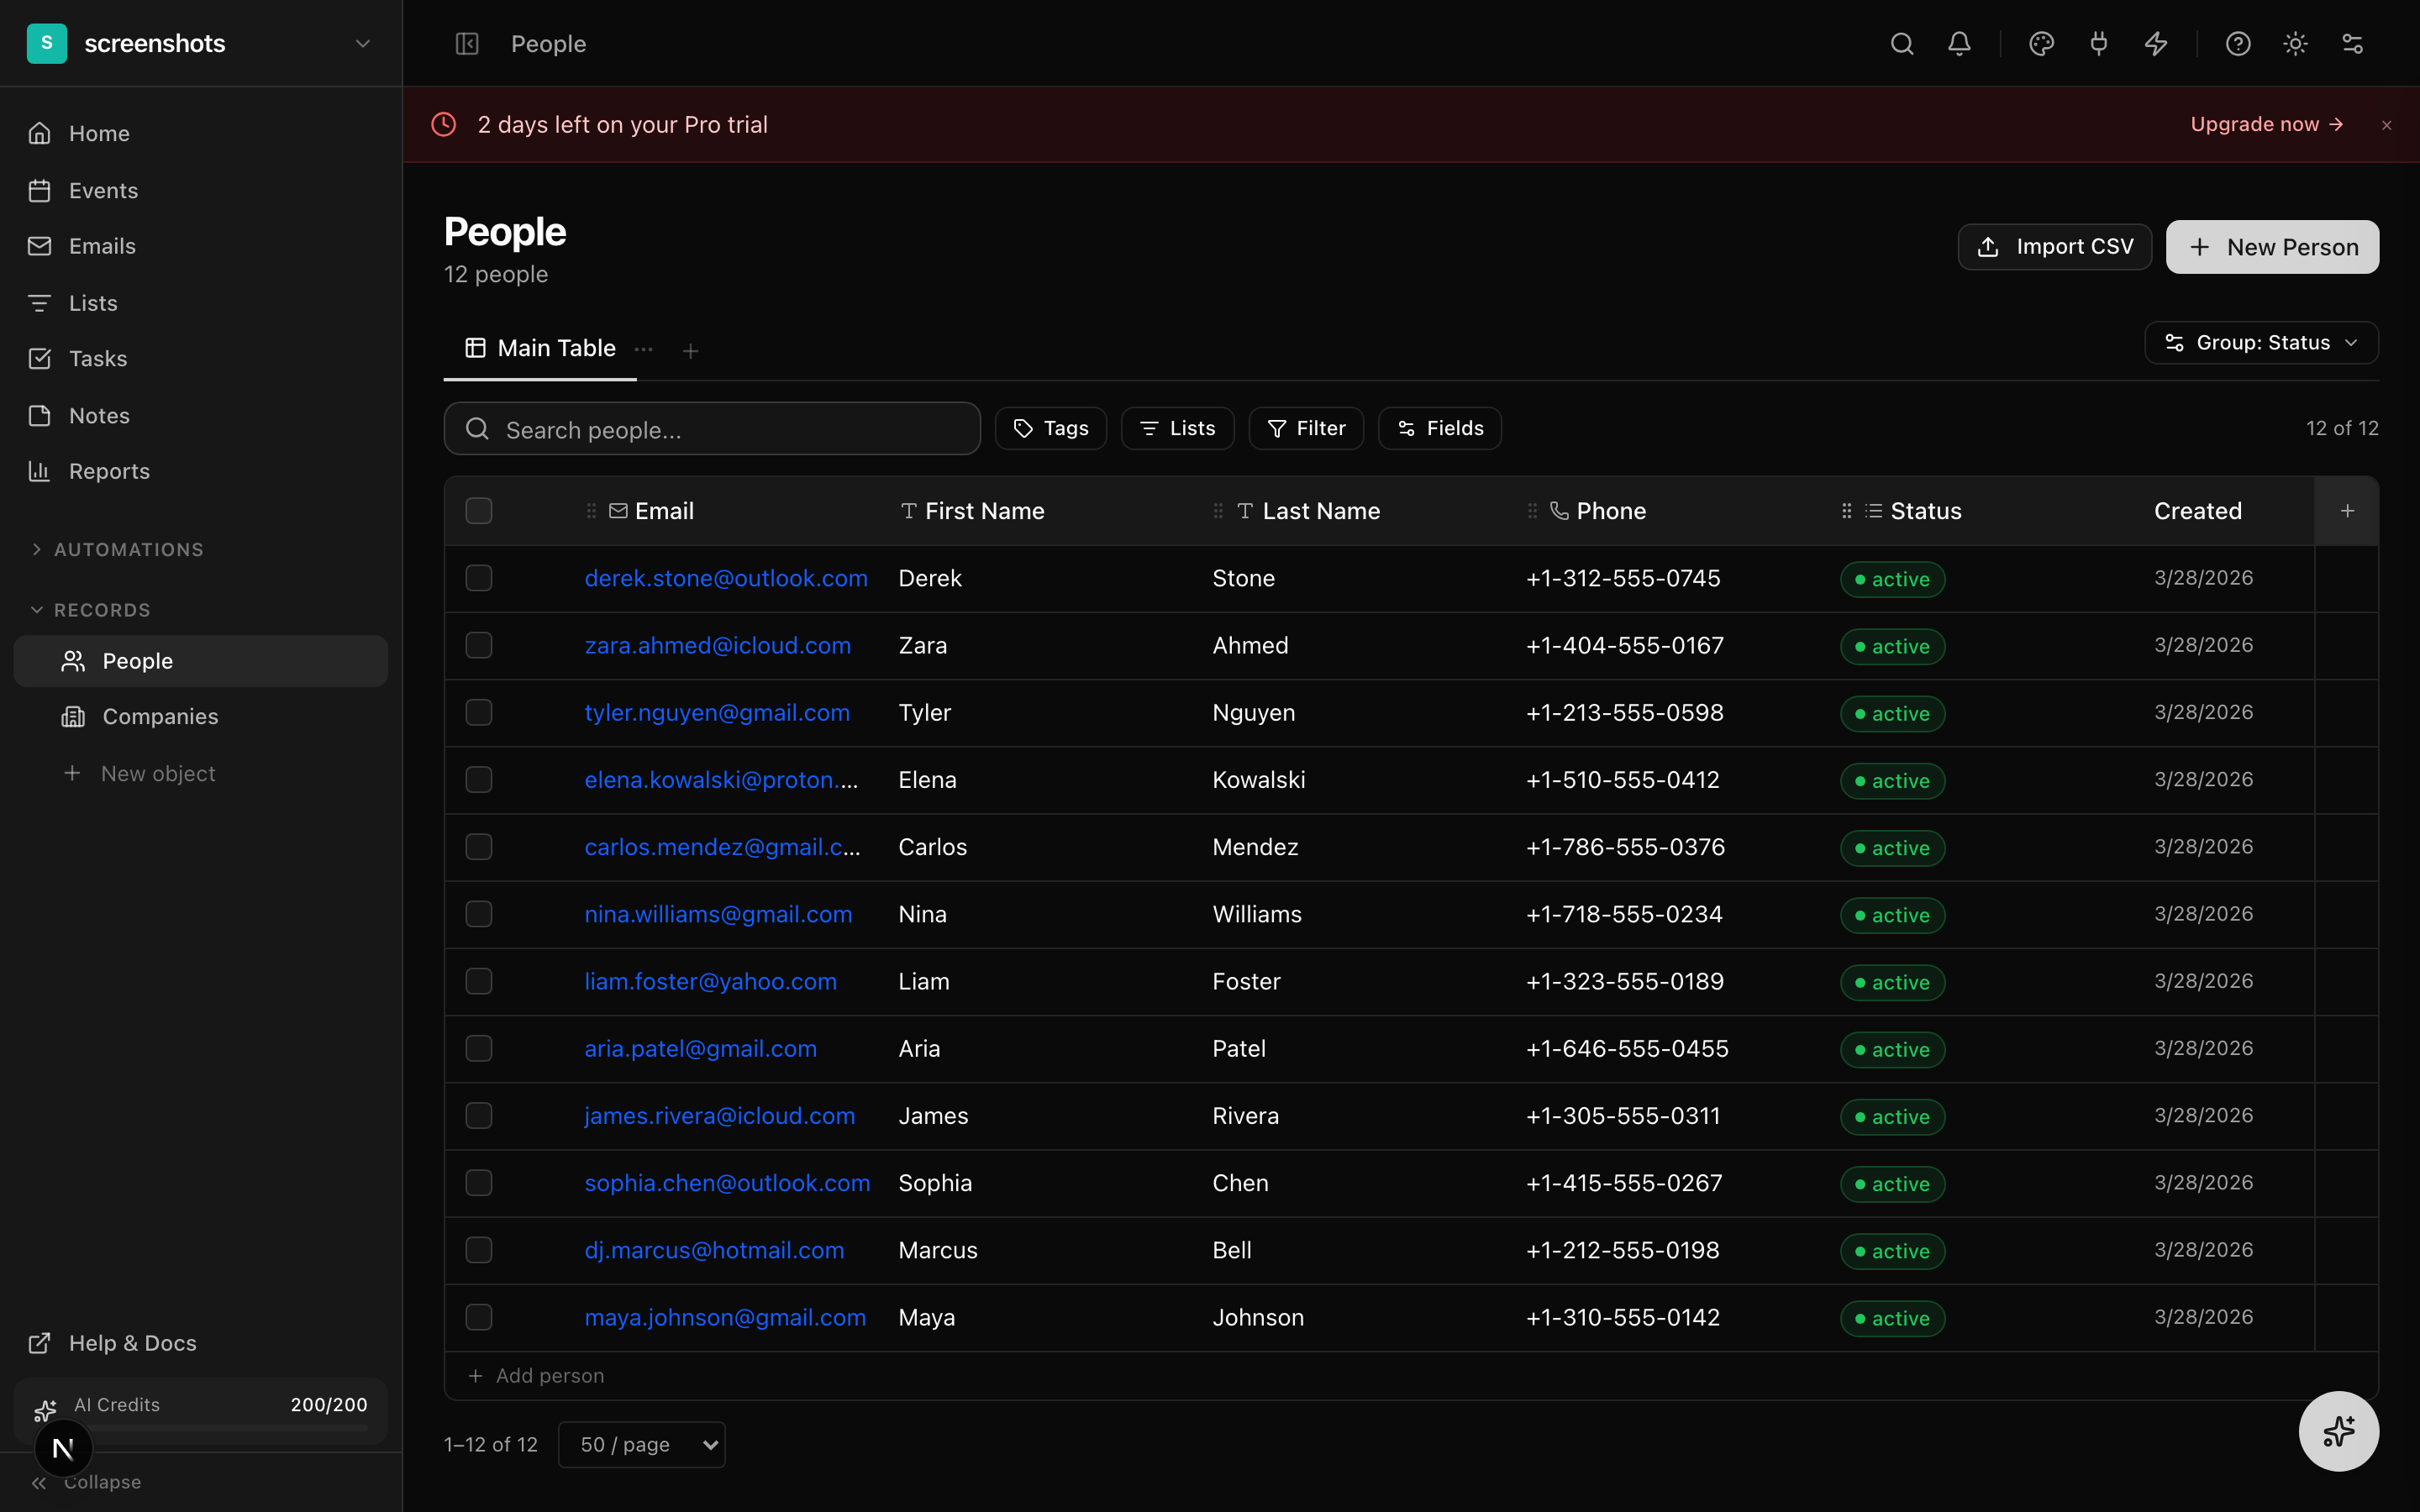
The Spreadsheet-Style Table
The People page displays all contacts in a powerful spreadsheet-style table. Here is how to work with it:
Inline Editing
Double-click any cell to edit its value directly in the table. Press Enter to save, Escape to cancel. Text, number, date, email, URL, phone, and select fields all support inline editing with appropriate input controls (date pickers, dropdowns, etc.).
Keyboard Navigation
Navigate the table like a spreadsheet:
- Arrow keys — move between cells
- Tab — move to the next cell in the row
- Shift+Tab — move to the previous cell
- Enter — start editing the selected cell
- Escape — cancel editing or deselect
Sorting and Filtering
Click any column header to sort ascending or descending. Use the filter toolbar above the table to add filter conditions on any field. Filters support operators like equals, contains, starts with, is empty, and is not empty. Combine multiple filters with AND logic.
Column Management
Drag column headers to reorder them. Drag the right edge of a header to resize. Right-click a column header to access options: sort, hide, freeze, or resize to fit content. Use the column picker (the "+" icon at the end of the header row) to show or hide columns.
Bulk Selection
Click the checkbox on any row to select it. Use Shift+Click to select a range. Click the header checkbox to select all visible rows. When rows are selected, a bulk action bar appears at the bottom with options to add tags, add to list, export, or delete.
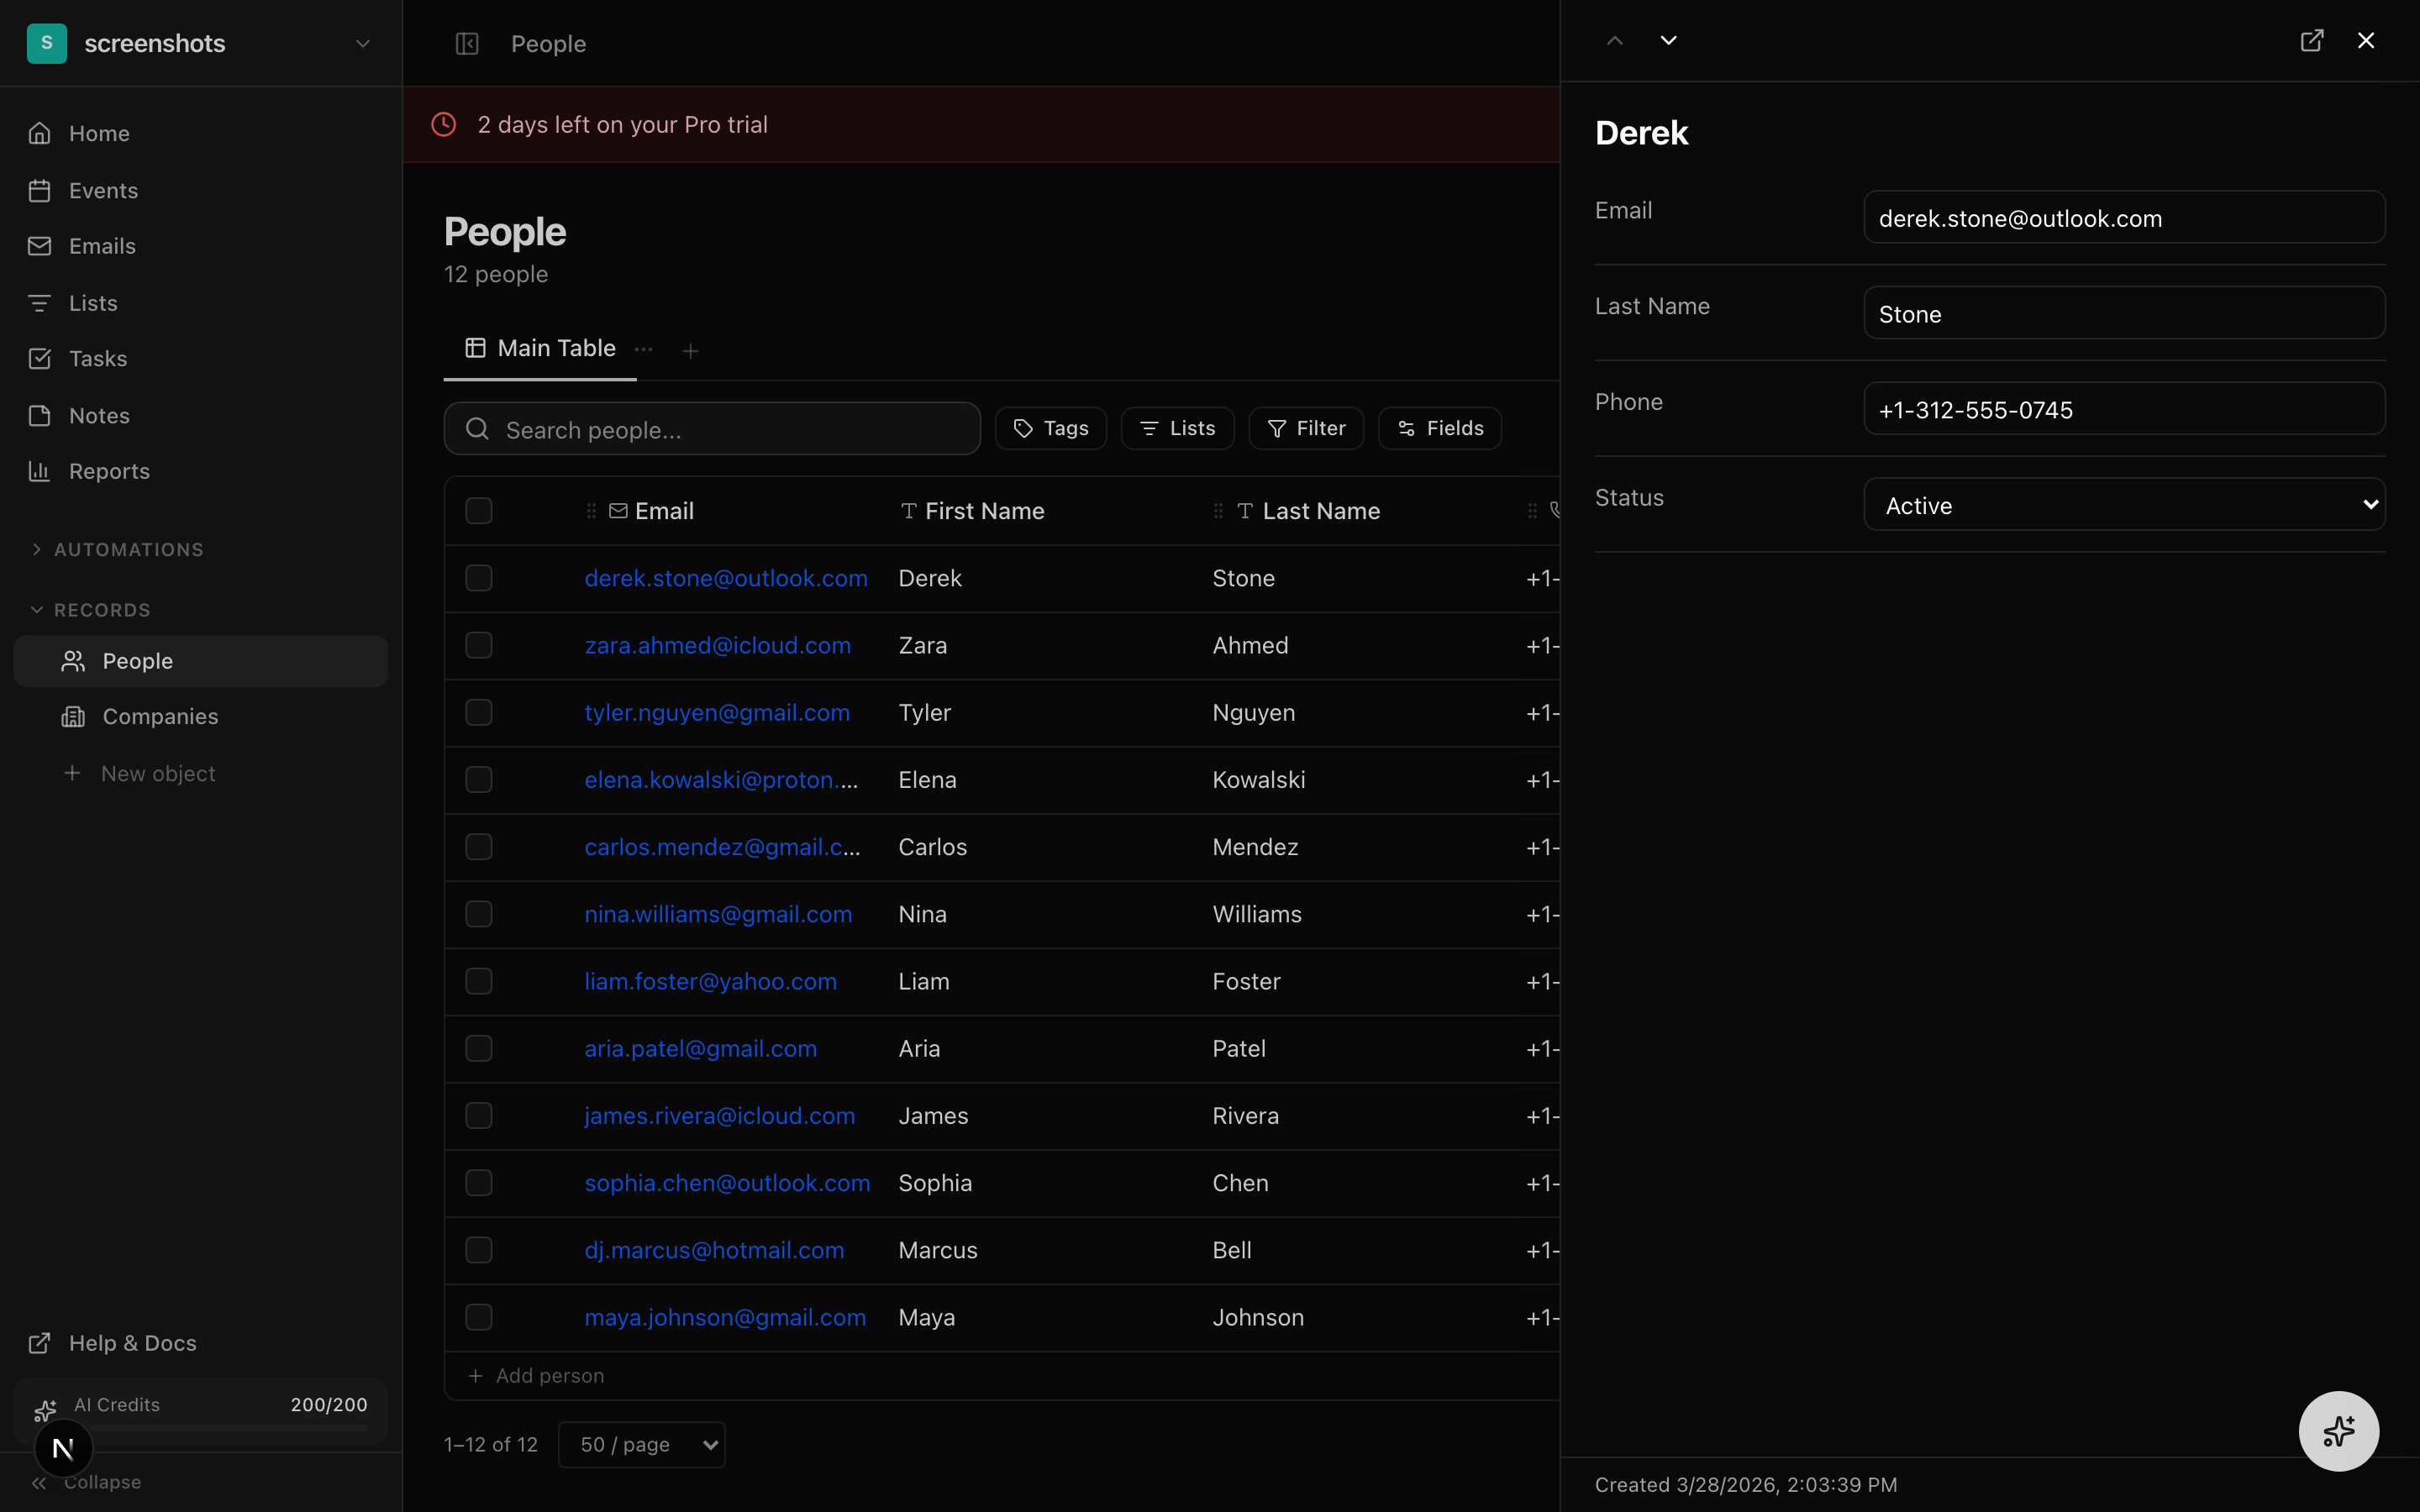
Record Detail Slide-Out Panel
Click the expand icon on any row (or press the right arrow shortcut) to open the record detail panel. This panel slides in from the right side of the screen, overlaying the table without navigating away.
How to Use the Detail Panel
- Click the expand button (arrow icon) on any table row to open the panel.
- All fields are displayed in an editable form layout. Click any field value to edit it inline.
- Use the up/down arrows at the top of the panel to navigate to the previous or next record without closing.
- The panel shows the person's tags, list memberships, and linked records (events attended, forms submitted, orders).
- Click the "X" or press Escape to close the panel and return to the table.
Right-Click Context Menu
Right-click any row in the People table to open a context menu with quick actions:
- Expand record — opens the slide-out detail panel
- Duplicate — creates a copy of the record with a new ID
- Copy link — copies the direct URL to this person's record
- Delete — removes the record (with confirmation dialog)
The context menu works on all object types in Modality (People, custom objects, events, etc.) and provides a consistent quick-action interface throughout the platform.
Tags and Lists
Tags
Tags are flexible labels you can attach to any person. Common examples include VIP, speaker, sponsor, newsletter, and event-specific tags. To manage tags:
- Select one or more rows in the table using checkboxes.
- Click the "Tags" button in the toolbar to open the tag popover.
- Search existing tags or type a new tag name and press Enter to create it.
- Click a tag to toggle it on/off for the selected people.
- Tags appear as colored badges in the Tags column of the table.
Lists
Lists are groups of people used for targeting campaigns. Unlike tags (which are metadata), lists are specifically designed for audience segmentation:
- Select rows in the People table.
- Click "Lists" in the toolbar to open the lists popover.
- Choose an existing list or create a new one inline.
- Selected people are added to the list immediately.
- Lists can be used as campaign audiences and automation targets.
Custom Fields
Extend the People model with custom fields to track any data your workflow requires. Custom fields are managed in Settings → Fields.
Supported Field Types
- Text — single-line or multi-line text
- Number — integer or decimal values
- Date — date picker with optional time
- Select — single selection from predefined options
- Multi-select — multiple selections from predefined options
- URL — clickable web links
- Email — validated email addresses
- Phone — phone numbers with formatting
- Currency — monetary values with currency symbol
- Checkbox — boolean true/false
- Rating — 1-5 star rating
How to Add a Custom Field
- Go to Settings → Fields in the sidebar.
- Click "Add Field" and choose the field type.
- Enter a label (display name) and optional description.
- For select/multi-select fields, define the available options.
- Click Save. The field immediately appears as a column in the People table and in the record detail panel.
{{company}} in the email editor.Import and Export
Importing from CSV
- Click the Import button in the People toolbar.
- Upload a CSV file or drag and drop it into the import dialog.
- The column mapper appears showing your CSV columns on the left and Modality fields on the right.
- Map each CSV column to the appropriate field. Unmapped columns are skipped.
- For multi-object routing, choose whether rows should create People, Companies, or custom object records.
- Review the preview showing the first 5 rows as they will be imported.
- Click Import. A progress bar shows the import status. Duplicates (matching email) are updated rather than created.
Exporting to CSV
Select rows using checkboxes (or select all), then click "Export" in the bulk action bar. The export includes all visible columns in the current table view. The CSV file downloads immediately.
Activity Timeline
Every person has a chronological activity feed accessible from their detail page. The timeline aggregates all interactions automatically:
- Form submissions — which form was submitted and when
- Ticket purchases — event name, ticket type, order amount
- Email activity — sends, opens, clicks (with clicked URL), bounces
- Tag changes — tags added or removed, with who made the change
- List membership — added to or removed from lists
- Automation triggers — which automations fired for this person
- Status changes — subscription status transitions (active, unsubscribed, bounced)
Each activity entry shows a timestamp, the action type with an icon, and contextual details. Click any entry to navigate to the related record (e.g., click a form submission to view the form).